Python3_django plugin tutorial
Let's create a plugin based on the python3_django plugin template. We will called it foo_django.
First, bootstrap the plugin with the command:
bootstrap_plugin.py create --template=python3_django foo_django
Once you have entered this command, you will be asked to fill in some fields to configure and customize your plugin: for now, press [ENTER] to set the default values, you will be able to modify your plugin configuration anytime later.
The plugin is created in the current directory, inside the directory named foo_django.
Check this directory, it contains only few files.
Let's now build the plugin by entering the command from the foo_django plugin directory:
make develop
This command will download and install Django framework and some other dependencies. It will also create the Django project with an "Hello World!" application.
Important
- if you are behind a proxy, you have to set
http_proxyandhttps_proxyenvironment variables in order to be able to download any Python package you may need. - you may also need to disable your Linux firewall:
      systemctl status firewalld
      systemctl stop firewalld.service
      systemctl disable firewalld
Once build is done, the foo_django plugin directory contains additional files and directories:
- db.sqlite3 file: the default SQLite database
- manage.py file: a convenience script that allows you to run administrative tasks like Django's included django-admin (see django-admin and manage.py)
- foo_django directory: the Python package for your project. Its name is the Python package name you’ll need to use to import anything inside it. This directory contains:
- __init__.py: An empty file that tells Python that this directory should be considered a Python package. If you’re a Python beginner, read more about packages in the official Python docs.
- settings.py: Settings/configuration for this Django project. Django settings will tell you all about how settings work.
- urls.py: The URL declarations for this Django project; a “table of contents” of your Django-powered site. You can read more about URLs in URL dispatcher.
- wsgi.py: An entry-point for WSGI-compatible web servers to serve your project.
- static: Static files of the applications (read more about The staticfiles app and Managing static files).
- main directory: the
mainapplication directory containing the application template files.
Now, you can check your application works by invoking the following URL: http://localhost:18868/foo_django/main (you may replace localhost by your remote host if needed). A HTML page must display Hello World from django main app.
Now, let's create a data model.
Go to the main directory of the plugin.
Edit the models.py as below:
from django.db import models

# Create your models here.

STATUS_CHOICES = [
    ('d', 'Draft'),
    ('p', 'Published'),
    ('w', 'Withdrawn'),
]


class Article(models.Model):
    title = models.CharField(max_length=100)
    body = models.TextField()
    status = models.CharField(max_length=1, choices=STATUS_CHOICES)
    test = models.TextField(default = "sdsd")

    def __str__(self):
        return self.title
Edit the admin.py as below:
from django.contrib import admin

# Register your models here.
from main.models import Article

admin.site.register(Article, admin.ModelAdmin)
Build the plugin with make develop command.
Then, enter into the plugin environment in order to be able to execute Django commands. Enter plugin_env command.
Create new migrations based on the changes detected to your models. Enter :
python manage.py makemigrations
Synchronize the database state with the current set of the model. Enter :
python manage.py migrate
See also Django migrations documentation
In order to check the model has been created in the SQLite database, enter :
sqlite3 db.sqlite3
.tables
Output :
auth_group                  django_admin_log
auth_group_permissions      django_content_type
auth_permission             django_migrations
auth_user                   django_session
auth_user_groups            main_article
auth_user_user_permissions
main_article is created
Create a superuser in order to be able to connect to the Django Administration site. Enter:
python manage.py createsuperuser
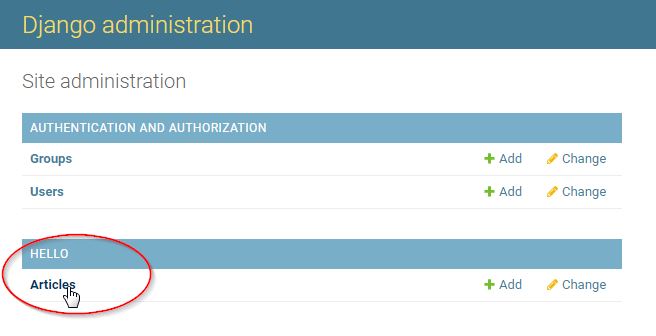
Now, from a browser, connect to the Django Administration site by invoking the following URL: http://localhost:18868/foo_django/admin (you may replace localhost by your remote host if needed).
Log in with the account you have just created.
Then click the Articles link in order to manipulate Article data (view, add, change, delete...):
In order to check the main application access to the database, edit the main/views.py as below:
from django.http import HttpResponse
from main.models import Article

def index(request):
    article_list = Article.objects.all()
    return HttpResponse("Hello World from django app. You have {} article(s).".format(article_list.count()))
Build again the plugin (make develop command).
Check your application still works by invoking the following URL: http://localhost:18868/foo_django/main
Hint
Set the debug parameter to 1 (instead of 0) in the [app_...] section of the plugin config.ini file, in order to get an interactive debugger in your browser: check Interactive debugger.
See also Configure a Metwork module